Creating an application
Open the OAuth2 applications page from your account dashboard and create a new application.
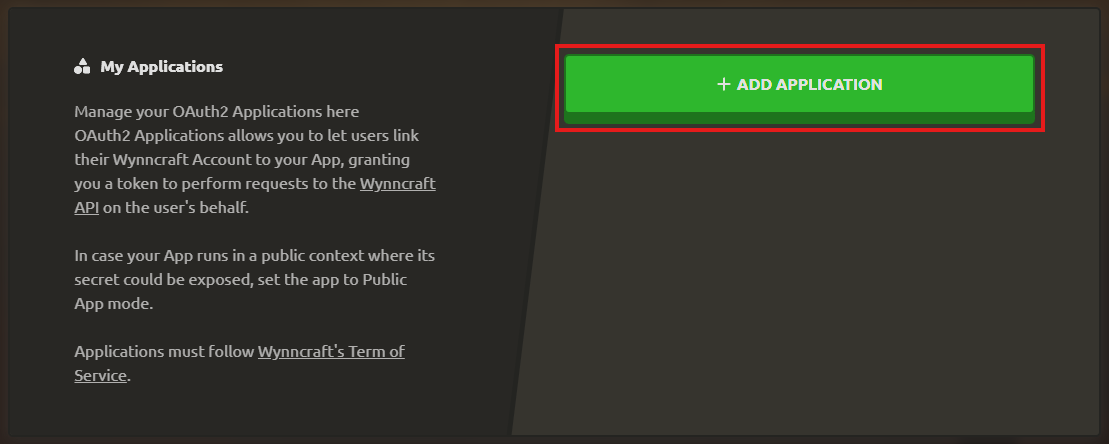
Each application represents one OAuth2 client.
After giving it a name, your application will be created and you will have access to this editor:
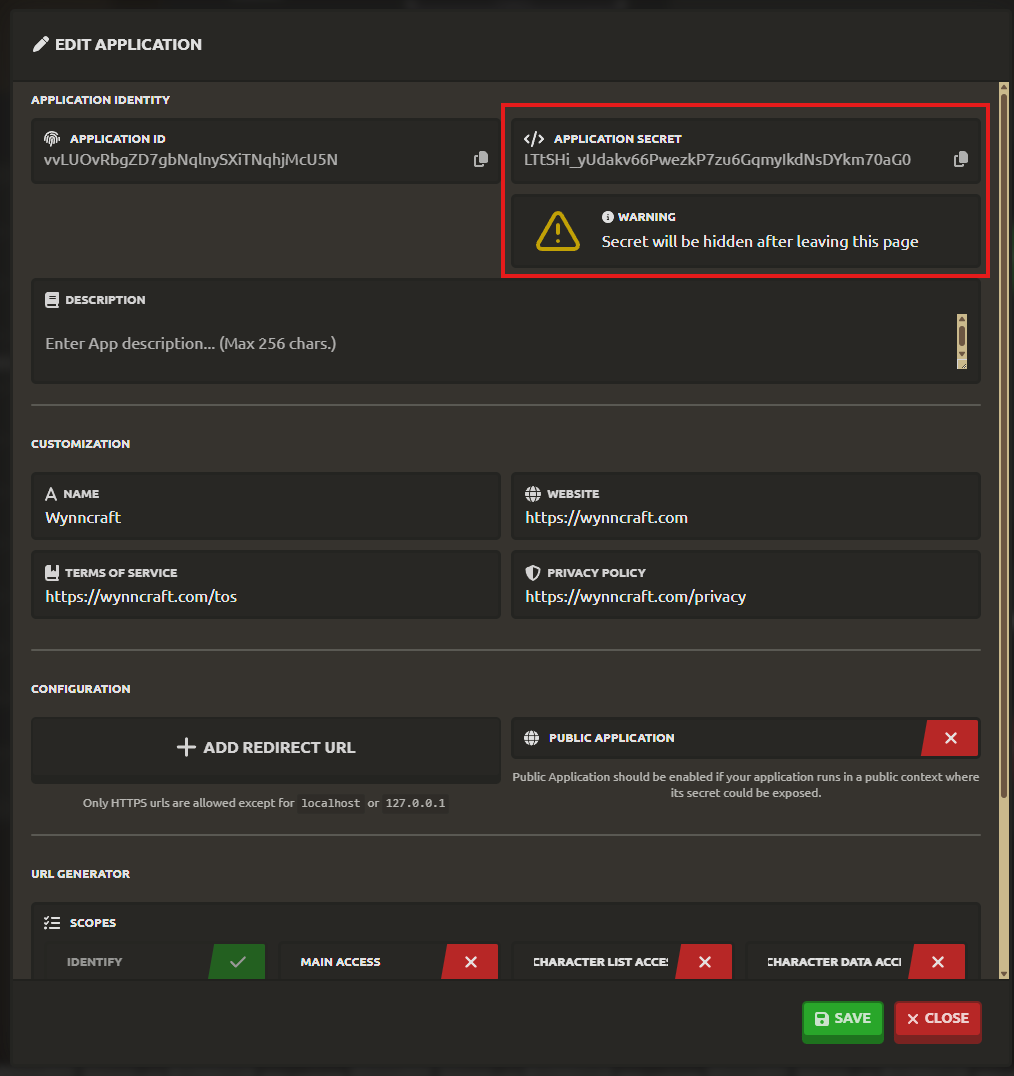
The application secret is hidden after leaving the page. Save it before closing the editor if your application is private and needs a client secret.
Application identity
The editor lets you see:
Application IDApplication Secret
and edit:
Description
Application metadata
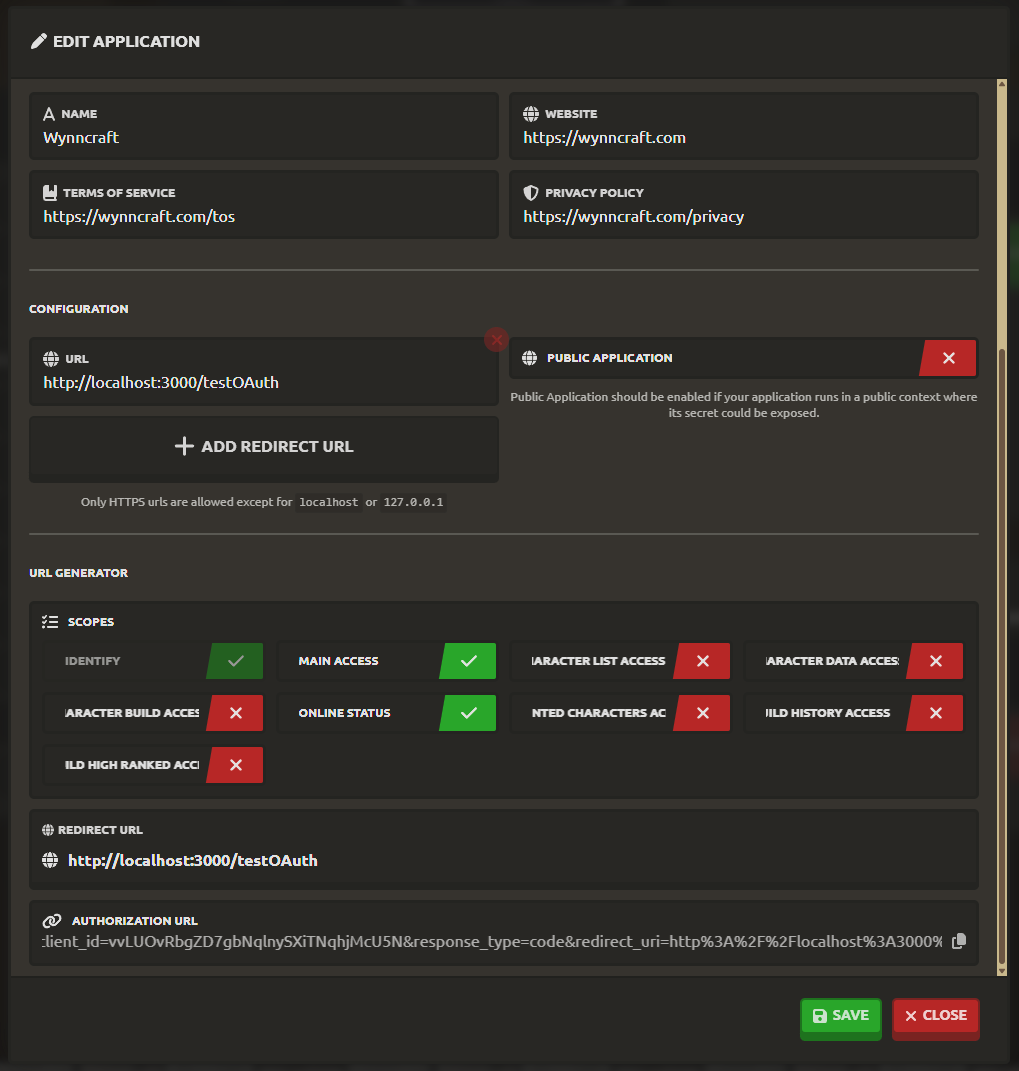
In the editor, you should set:
NameWebsiteTerms of ServicePrivacy Policy
These fields describe the client that is requesting access and should match the real application that users are authorizing.
Redirect URIs
Applications can define one or more redirect URLs.
Use Add Redirect URL to register every callback URL your application will use.
Only https redirect URLs are allowed, except for local development URLs using localhost or 127.0.0.1.
The redirect URI used during authorization must match the one used later during token exchange.
Public and private applications
The editor includes a Public Application toggle.
Enable public mode when your application runs in an environment where the secret could be exposed.
In practice:
- Public applications should not rely on a client secret.
- Private applications can use a client secret.
The API behavior for public and private applications is documented on the token exchange route at POST /oauth/token.
Scopes
The URL generator lets you enable the scopes your application requests.
The UI currently exposes:
identifymain_accesscharacter_list_accesscharacter_data_accesscharacter_build_accessonline_statushunted_characters_accessguild_history_accessguild_high_ranked_access
Only request the scopes your application actually needs.
URL generator
The editor also shows:
- the selected redirect URI
- a generated authorization URL
Use that generated URL to verify that your selected redirect URI and requested scopes match the application configuration before integrating the OAuth2 flow in your client.